


原文地址:https://lefred.be/content/extending-mysql-using-the-component-infrastructure-part-2-building-the-server/
作者:lefred
發布時間:2022年1月6日
這是 運用基礎組件擴展MySQL 系列文章的第二篇:
- Extending MySQL using the Component Infrastructure – part 1
- Extending MySQL using the Component Infrastructure – part 2: building the server
- Extending MySQL using the Component Infrastructure – part 3: component services
- Extending MySQL using the Component Infrastructure – part 4: error logging
- Extending MySQL using the Component Infrastructure – part 5: privileges
- Extending MySQL using the Component Infrastructure – part 6: functions
- Extending MySQL using the Component Infrastructure – part 7: messages to users
在該系列的第一篇文章中,描述了我們新組件的核心思想。
現在我們需要配置開發環境并從頭開始編譯服務器。
下載源碼
如第一篇文章所說,有多種方式可以獲取MySQL源碼,我這里從GitHub的存儲庫取。然后你需要安裝git:
$ git clone https://github.com/mysql/mysql-server.git
然后你需要準備安裝目錄
$ cd mysql-server
$ mkdir BIN-DEBUG
在編譯MySQL服務器之前,你需要先安裝一些依賴包,例如 CMake,一個編譯器,Linux上的make和curses開發包,bison……
安裝MySQL
$ cd BIN-DEBUG
$ cmake .. -DDOWNLOAD_BOOST=1 -DWITH_BOOST=../downloads
我們指定所需boost版本的下載
$ make -j 4
-j 4 使用4個編譯線程,你可以根據系統進行調整
所有內容編譯完成后,你可以運行和測試新的已編譯服務器。
測試
最簡單的測試方式,就是使用mtr:
$ cd mysql-test
$ perl mtr --mem --start
...
worker[1] Using config include/default_my.cnf
worker[1] Port and socket path for server(s):
worker[1] mysqld.1  13000  /home/fred/workspace/mysql-server/BIN-DEBUG/mysql-test/var/tmp/mysqld.1.sock
worker[1] Waiting for server(s) to exit...
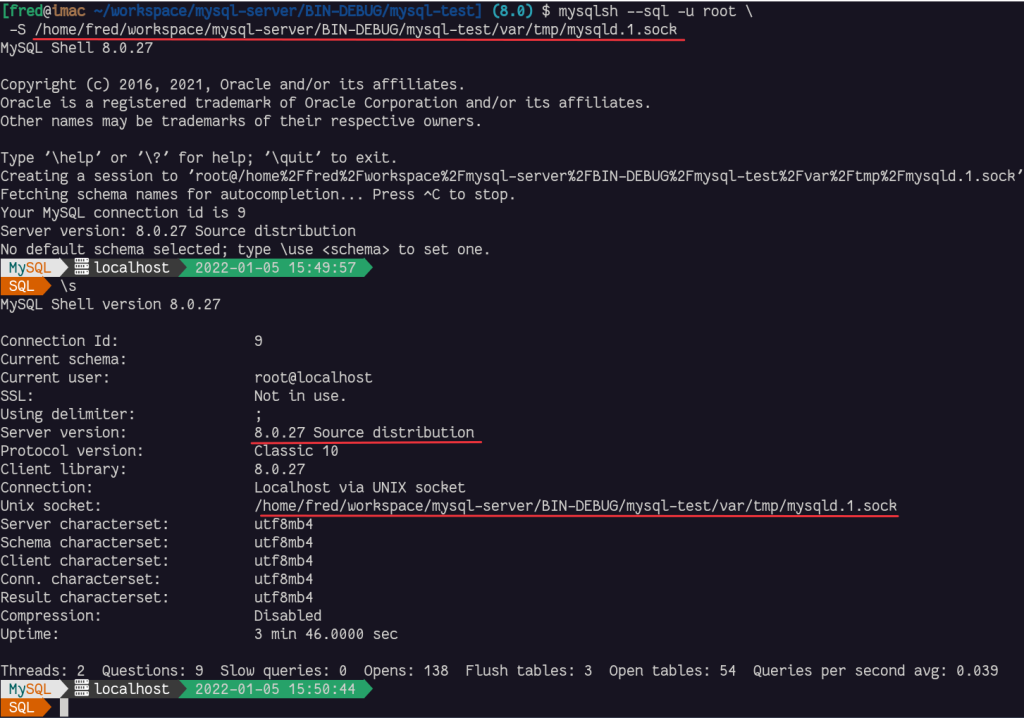
我們可以用MySQL Shell和socket文件連接到新編譯的MySQL服務器:
$ mysqlsh --sql -u root \
 -S /home/fred/workspace/mysql-server/BIN-DEBUG/mysql-test/var/tmp/mysqld.1.sock
結論
現在我們可以從源碼編譯MySQL并啟動我們新建的服務器。這將是我們新組件的基礎。
在下一篇文章,我們將設置檢查需要哪些組件服務,并創建我們組件的框架。
關注我
關注@lefred
通過電子郵件訂閱博客
請輸入您的電子郵件地址以訂閱本博客,并通過電子郵件接收新文章的通知。
最后修改時間:2022-05-17 21:21:30
「喜歡這篇文章,您的關注和贊賞是給作者最好的鼓勵」
關注作者
【版權聲明】本文為墨天輪用戶原創內容,轉載時必須標注文章的來源(墨天輪),文章鏈接,文章作者等基本信息,否則作者和墨天輪有權追究責任。如果您發現墨天輪中有涉嫌抄襲或者侵權的內容,歡迎發送郵件至:contact@modb.pro進行舉報,并提供相關證據,一經查實,墨天輪將立刻刪除相關內容。
